Categories

Navigating gas stove issues? This guide offers solutions for common problems, from ignition failures to gas odors, ensuring safe and efficient cooking experiences.
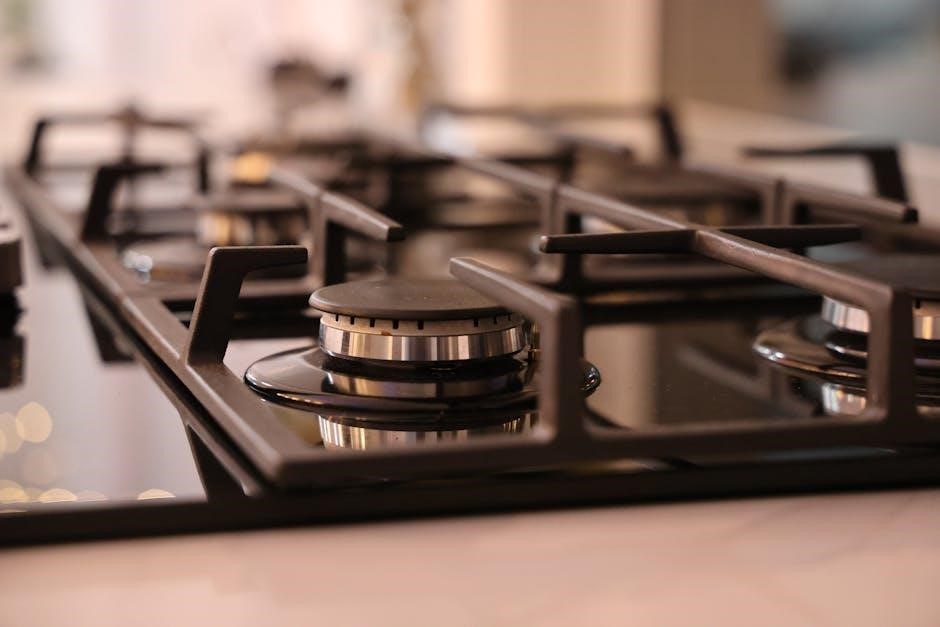
Gas stoves rely on a precise system for safe and efficient operation. Natural gas or propane fuels burners, ignited by an electric spark or pilot light. Key components include the burner head, ports (where flames emerge), igniter, gas valve, and often a thermocouple or spark module.
The gas valve controls gas flow, while the thermocouple or spark module ensures the flame stays lit. Understanding these parts is crucial for troubleshooting. Modern stoves often feature electronic ignition, while older models may use a standing pilot. Knowing your stove’s type helps pinpoint issues. Regular cleaning and maintenance are vital for optimal performance and longevity.
Prioritize safety when troubleshooting! Always disconnect the gas supply before performing any repairs. Never attempt repairs if you smell gas – evacuate immediately and call emergency services. Ensure adequate ventilation during use to prevent carbon monoxide buildup.
Avoid using flammable cleaning products near the stove. Regularly check gas connections for leaks using a soapy water solution. If a burner flame is yellow or orange, it indicates incomplete combustion and potential carbon monoxide risk; address it promptly. Familiarize yourself with your stove’s manual and heed all warnings.
Prepare for effective repairs! A screwdriver set (Phillips and flathead) is essential for accessing components. Pliers are useful for gripping and manipulating parts. A multimeter helps test electrical components like the igniter and spark module. A wrench set accommodates various gas connection fittings.
A soapy water solution detects gas leaks. A small brush cleans burner ports. Safety glasses protect your eyes. A flashlight illuminates dark areas. Consider a gas leak detector for added safety. Having these tools readily available streamlines the troubleshooting process and ensures efficient repairs.
Facing stove issues? Explore solutions for igniter failures, weak flames, gas odors, and clicking sounds without ignition – restoring your cooking setup quickly!
A non-sparking igniter is a frequent issue. First, Checking the Igniter Switch ensures it’s receiving power; a multimeter can confirm functionality. Next, Inspecting the Igniter Electrode is crucial – look for debris or damage obstructing the spark. Clean carefully with a dry cloth.
If the electrode appears fine, Testing the Spark Module is the next step. This component delivers the electrical charge. A faulty module won’t generate a spark. Accessing and testing it often requires disconnecting power and potentially removing burner parts. Always prioritize safety and consult your stove’s manual. A replacement module might be necessary if testing reveals a failure.
Begin by verifying the igniter switch’s power supply. A simple test involves listening for a clicking sound when the knob is turned – this indicates the switch is attempting to engage. If no click is heard, the switch itself may be defective.
Using a multimeter is the most reliable method. Disconnect power to the stove first! Set the multimeter to voltage mode and test the switch terminals while activating it. A reading confirms power is reaching the switch. No reading suggests a wiring issue or a faulty switch requiring replacement. Always consult the stove’s manual for specific wiring diagrams and safety precautions.
The igniter electrode is crucial for sparking the gas. Visually inspect it for any damage – cracks, breaks, or excessive corrosion can prevent proper ignition. Ensure the electrode is correctly positioned near the burner port; misalignment hinders spark delivery.
Clean the electrode thoroughly with a soft brush or cloth to remove any food debris or buildup. A clogged electrode won’t spark effectively. Carefully check for any obstructions blocking the spark gap. If the electrode is severely corroded or damaged, replacement is necessary for safe and reliable operation. Remember to disconnect power before any inspection or cleaning.
The spark module provides the high voltage needed for ignition. To test it, carefully listen for a clicking sound when turning the burner knob to the ‘light’ position. If no click is heard, the module may be faulty. A multimeter can verify voltage output, but this requires electrical knowledge and caution.
Disconnect power before testing! If you’re uncomfortable with electrical testing, consult a qualified technician. A failing spark module often causes multiple burners to fail simultaneously. Replacement is usually straightforward, but ensure the new module is compatible with your stove model. Always prioritize safety when working with electrical components.
A weak flame indicates insufficient gas reaching the burner. Several factors can contribute to this issue, ranging from low gas pressure to obstructions within the burner itself. Initially, check if other gas appliances in your home exhibit the same problem, suggesting a broader gas supply issue.
Clogged burner ports and a dirty burner head are common culprits. These restrict gas flow, resulting in a diminished flame. Thorough cleaning is often the solution. If cleaning doesn’t resolve the issue, low gas pressure or a regulator problem may require professional attention. Never attempt to adjust the gas regulator yourself!
Reduced gas pressure significantly impacts flame intensity. If multiple gas appliances are affected, the problem likely originates with the main gas supply or regulator. Contact your gas provider immediately to investigate potential issues with the incoming gas line or neighborhood pressure.
Do not attempt to adjust the gas regulator yourself; this is extremely dangerous and requires a qualified technician. A faulty regulator can cause inconsistent or dangerously low gas flow. If only the stove is affected, a problem within the stove’s gas line or valve is more probable, requiring professional diagnosis and repair.

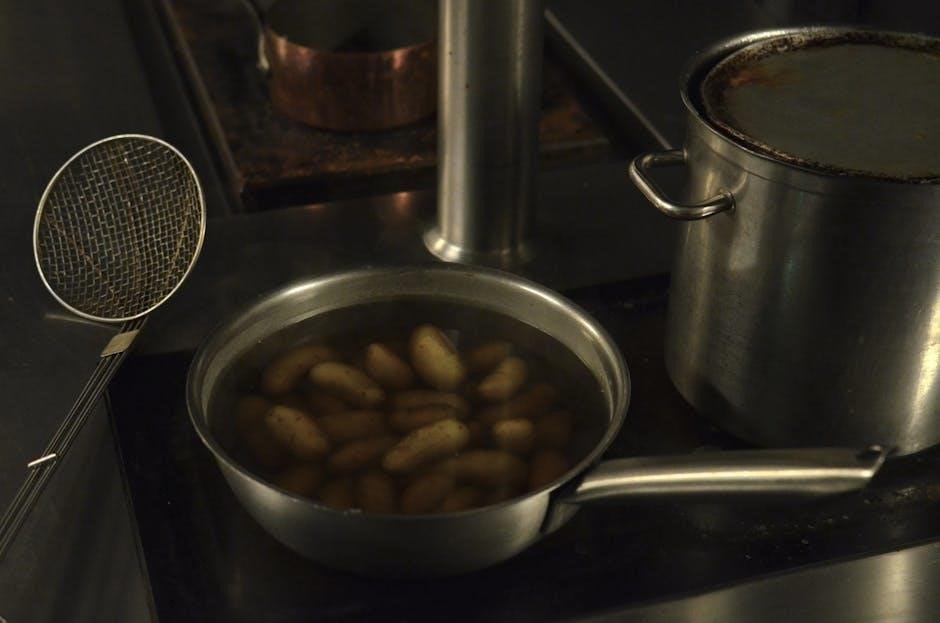
Clogged burner ports restrict gas flow, resulting in a weak or uneven flame. Food debris, spills, or mineral deposits are common culprits. Begin by carefully removing the burner cap and head. Use a thin wire, needle, or specialized burner cleaning tool to gently clear each port individually – avoid enlarging the holes!
Compressed air can also effectively dislodge debris. After cleaning, ensure all ports are clear before reassembling the burner. A thorough cleaning restores proper gas distribution, leading to a consistent and efficient flame. Regular cleaning prevents future clogging and maintains optimal stove performance.
A dirty burner head hinders proper gas distribution and flame quality. Grease, food particles, and spills accumulate, obstructing the gas flow and causing uneven heating. Remove the burner head and soak it in a solution of warm, soapy water for at least 30 minutes to loosen debris.
Use a non-abrasive brush or sponge to scrub away stubborn residue. Rinse thoroughly and ensure all ports are clear before drying completely. A clean burner head ensures a consistent, blue flame and optimal cooking performance. Regular cleaning prevents buildup and maintains efficient stove operation.

A gas odor signifies a potential leak, demanding immediate attention. Never ignore this warning sign! Immediately extinguish all open flames and avoid operating any electrical switches, as sparks can ignite the gas. Open windows and doors to ventilate the area thoroughly, dispersing the gas.
Do not attempt to locate the leak yourself; evacuate everyone from the building. Contact your gas company or emergency services from a safe location. They possess the expertise and equipment to identify and repair the leak safely. Prioritize safety – a gas leak is a serious hazard requiring professional intervention.
Locating the gas leak’s origin is best left to qualified professionals. Do not attempt this yourself! However, observing clues before professionals arrive can be helpful. Sniff carefully (from a safe distance) around gas connections – the stove itself, the gas line leading to it, and the gas meter.
Bubbles forming in soapy water applied to connections indicate a leak. Note any areas with a strong gas smell. Remember, your sense of smell isn’t a precise instrument; trust the professionals to pinpoint the exact source using specialized equipment. Your safety is paramount; avoid any actions that could potentially ignite the gas.
After a professional confirms it’s safe, visually inspect gas connections for corrosion, damage, or looseness. Gently tighten connections with a wrench, but avoid over-tightening, which can cause further issues. A soapy water solution is crucial: brush it onto all connections – fittings, pipes, and the regulator.
Bubbles forming indicate a leak, even a small one. If bubbles appear, immediately turn off the gas supply and call a qualified technician. Never use a flame to check for leaks! Regular inspection of these connections is a vital preventative measure, ensuring a secure and safe gas supply to your stove. Prioritize safety above all else.
If you suspect a gas leak, act immediately! First, do not operate any electrical switches – this includes lights, appliances, or even your phone. A spark could ignite the gas. Open windows and doors to ventilate the area thoroughly, allowing the gas to dissipate.
Evacuate everyone from the building immediately and move to a safe location. Once outside, contact your gas company or emergency services from a neighbor’s house or mobile phone, away from the leak. Do not re-enter the building until a professional deems it safe. Prioritize life safety above all else during a gas leak emergency.
A clicking sound with no flame often indicates an ignition problem. This could stem from a faulty igniter switch, preventing the spark from reaching the gas. Alternatively, blocked burner ports can obstruct the gas flow, hindering ignition despite a spark. A malfunctioning gas valve might also be the culprit, failing to release gas to the burner.
Begin by cleaning the burner ports. If the issue persists, test the igniter switch for continuity. If it fails, replacement is necessary. If the problem continues, a professional should inspect the gas valve for proper operation, as this involves potentially dangerous components.
A failing igniter switch prevents the spark needed to ignite the gas. To test, listen for a distinct click when turning the knob; absence suggests a switch issue. Use a multimeter to check for continuity across the switch terminals – no continuity indicates failure.
Replacing the igniter switch is usually straightforward, but always disconnect the gas supply first! Locate the switch beneath the control knob, carefully disconnect the wires, and install the new switch. Ensure proper alignment and secure connections. If unsure, consult a qualified appliance technician for safe and effective repair.
Clogged burner ports restrict gas flow, leading to an uneven or weak flame. Food debris, spills, or rust are common culprits. Begin by visually inspecting the burner for obstructions. Use a thin wire, needle, or specialized burner cleaning tool to carefully clear each port.
Avoid enlarging the ports, as this alters the gas-air mixture. After cleaning, reassemble the burner and test the flame. If blockage persists, soak the burner head in warm, soapy water before repeating the cleaning process. Regular cleaning prevents buildup and ensures optimal performance.
A faulty gas valve can prevent gas from reaching the burner, resulting in no flame despite a working igniter. This is a serious issue requiring careful attention. Do not attempt to repair the gas valve yourself; it’s best left to a qualified technician due to safety concerns.
Symptoms include a clicking sound without ignition or a very weak flame. A technician will test the valve’s functionality and replace it if necessary. Ignoring a malfunctioning gas valve poses a significant safety risk, potentially leading to gas leaks. Prioritize professional assistance for this repair.

Facing persistent issues? Explore calibration, draft checks, thermocouple problems, and gas valve malfunctions for complex gas stove repairs and optimal performance.
Experiencing hot and cold spots on your cooktop? Uneven heating often stems from improper burner flame calibration or external drafts disrupting the heat distribution. Begin by carefully observing the flame – it should be blue and consistent around the entire burner. Adjust the air shutter (if equipped) to achieve the correct air-gas mixture for optimal combustion.
Next, investigate potential drafts. Even a slight breeze from an open window or vent can significantly impact burner performance. Shield the stove from drafts, and re-evaluate the heating pattern. If the problem persists, a deeper inspection of the burner assembly might be necessary, checking for obstructions or damage that could cause inconsistent flame distribution. Consistent heat is crucial for even cooking results.
Achieving a properly calibrated flame is vital for efficient cooking. Start by observing the flame color; a vibrant blue indicates complete combustion, while yellow or orange suggests an insufficient air-gas mixture. Many stoves feature an air shutter near the burner – adjust it to control airflow. Opening the shutter increases air, resulting in a bluer flame, while closing it reduces air.
Make small adjustments and observe the flame after each change. The goal is a stable, blue flame that doesn’t lift from the burner. If adjustments don’t resolve the issue, consult your stove’s manual or a qualified technician. Proper calibration ensures optimal heat output and minimizes wasted gas.
Drafts can significantly impact burner performance, causing uneven heating. Begin by ensuring windows and doors near the stove are closed to minimize external airflow. Pay attention to ventilation sources like exhaust fans or open vents, as these can create drafts. Observe the burner flames; a flickering or unstable flame often indicates a draft is present.
Carefully feel around the stove for any noticeable air currents. If drafts are identified, address the source. Sometimes, simply repositioning cookware can help shield the flame. Consistent drafts necessitate addressing the underlying cause to maintain consistent cooking temperatures and prevent inefficient gas usage.
A stove shutting off mid-use is concerning and often points to safety features activating. The most common culprit is a malfunctioning thermocouple, a safety device that detects if the gas flame is present. If the flame goes out, the thermocouple shuts off the gas supply. A faulty thermocouple requires replacement by a qualified technician.
Alternatively, a failing gas valve could be the issue, intermittently interrupting the gas flow. This is a more serious problem requiring professional diagnosis and repair. Never attempt to repair a gas valve yourself. Ensure proper ventilation and avoid using the stove until the issue is resolved to prevent potential gas leaks.
The thermocouple is a vital safety component, constantly monitoring the burner flame. If it cools down too quickly – indicating a flame outage – it signals the gas valve to shut off, preventing gas buildup. A weak or dirty thermocouple struggles to sense the flame reliably, causing intermittent shutdowns.
Testing involves observing if the stove consistently shuts off after a short period. Cleaning the thermocouple with fine steel wool can sometimes restore functionality, but often, replacement is necessary. Important: This is best left to a qualified technician due to the gas connection. A failing thermocouple is a significant safety hazard and requires prompt attention.
The gas valve controls the gas flow to the burner; a malfunction can cause the stove to turn off unexpectedly. This could stem from a faulty solenoid, internal corrosion, or a damaged valve seat preventing a secure gas flow. Symptoms include inconsistent flame levels or complete failure to ignite despite a working igniter.
Do not attempt to repair a gas valve yourself! This is a highly dangerous task requiring specialized knowledge and tools. A malfunctioning gas valve poses a serious risk of gas leaks and potential explosions. Immediately contact a qualified appliance repair technician to diagnose and replace the valve safely and effectively.

A healthy gas stove flame should be blue. Yellow or orange flames indicate an incomplete combustion, meaning the burner isn’t receiving enough air to mix properly with the gas. This often results from obstructed burner ports or a misadjusted air shutter. While a slight yellow tip is sometimes acceptable, a predominantly yellow/orange flame is concerning.
Crucially, this signifies a potential carbon monoxide risk. Carbon monoxide is a colorless, odorless, and deadly gas. Immediately extinguish the burner and ventilate the kitchen. Do not use the stove until the issue is resolved by a qualified technician. Addressing this promptly is vital for your safety.
The proper air-gas mixture is essential for complete combustion and a blue flame. If the mixture is off, incomplete combustion occurs, leading to a yellow or orange flame and potential carbon monoxide production. This imbalance can stem from a clogged air shutter, restricting airflow to the burner. Conversely, a loose or damaged shutter allows too much air.
Carefully inspect the air shutter (usually a rotating collar around the burner tube) and adjust it to achieve a stable, blue flame. If adjustment doesn’t resolve the issue, a professional may need to recalibrate the gas valve or inspect the burner assembly for damage. Prioritize safety and ventilation.
A yellow or orange flame signifies incomplete combustion, potentially releasing dangerous carbon monoxide (CO). This odorless, colorless gas is extremely hazardous and can be fatal. Ensure adequate ventilation by opening windows and using your stove’s exhaust fan whenever the stove is in use.
Invest in a carbon monoxide detector and place it near the kitchen. If you suspect a CO leak – experiencing headache, dizziness, nausea – immediately evacuate the premises and call emergency services. Do not attempt to troubleshoot the stove yourself; a qualified technician must address the issue.
Trouble igniting your gas oven? The issue often stems from a faulty oven igniter. This component may weaken over time, failing to generate a sufficient spark to ignite the gas. Check the igniter visually for any cracks or damage; a replacement might be necessary. Alternatively, a problem with the oven gas valve could be preventing gas flow.
Before attempting repairs, ensure the gas supply to the oven is shut off. If you’re uncomfortable with gas appliance repairs, contact a qualified technician. Ignoring the problem could lead to gas buildup and a potential safety hazard.
A failing oven igniter is a frequent cause of lighting difficulties. These igniters, typically glow bars or spark igniters, require sufficient voltage to function correctly. Visually inspect the igniter for cracks or breaks; even small damages can hinder performance. Use a multimeter to test the igniter’s continuity – a lack of continuity indicates a failed component needing replacement.
Remember to disconnect power and the gas supply before any inspection. Replacing an oven igniter is often a straightforward DIY task, but if unsure, consult a qualified appliance repair professional for assistance and safety.
If the igniter glows but the oven doesn’t heat, a malfunctioning gas valve is a likely culprit. This valve controls the gas flow to the burner. Testing a gas valve requires specialized knowledge and tools, making it best left to a qualified technician due to safety concerns.
A faulty valve might not open fully, resulting in a weak or nonexistent flame. Never attempt to repair a gas valve yourself; improper handling can lead to gas leaks and dangerous situations. Professional diagnosis and replacement are crucial for safe oven operation.

Regular cleaning and inspections are key to preventing gas stove issues, ensuring optimal performance, and maintaining safety for years of reliable cooking.
Maintaining a clean gas stove is crucial for safety and performance. Begin by removing burner grates and caps, washing them with warm, soapy water, and thoroughly drying them before replacement; For burner ports, use a thin wire or needle to gently clear any clogs, ensuring even flame distribution.
The stovetop surface should be wiped down after each use to prevent spills from baking on. For stubborn residue, a specialized stovetop cleaner can be employed, following the manufacturer’s instructions carefully. Don’t forget to clean around the igniter electrodes, being cautious not to damage them. Regular cleaning prevents buildup that can lead to uneven heating, weak flames, or even gas leaks.
Regularly inspect gas lines and connections for leaks is paramount for safety. Visually examine the flexible gas connector for any cracks, kinks, or corrosion. Prepare a soapy water solution (water mixed with dish soap) and brush it onto all gas connections – fittings, valves, and the connector itself.
Bubbles forming indicate a leak; immediately turn off the gas supply and contact a qualified professional. Never use a flame to check for leaks! Ensure the stove is properly ventilated. Tighten any loose connections carefully, but avoid over-tightening. If you smell gas, even without visible bubbles, evacuate the area and call your gas company.
Schedule a professional gas stove inspection annually, even without apparent issues. A qualified technician can thoroughly assess the entire system, including the gas valve, regulator, burner assembly, and ventilation. They possess specialized tools to detect subtle leaks and ensure proper combustion.
Prioritize inspections if you notice persistent problems, have recently moved into a new home, or after any gas line repairs. Regular professional maintenance extends the lifespan of your stove and, most importantly, safeguards against carbon monoxide poisoning and potential gas explosions. Don’t compromise on safety – proactive inspections are key!